


H644l2 is a versatile and highly efficient system designed for a range of applications, making it an essential tool for professionals and enthusiasts alike. Its popularity has grown due to its reliability, ease of use, and adaptability in both personal and industrial settings. Understanding the fundamentals of H644l2, including its components and potential applications, is crucial before beginning the installation process. Users can leverage H644l2 for improving productivity, automating tasks, and integrating with other technological systems. This guide aims to provide a comprehensive walkthrough of H644l2 installation while highlighting essential tips, troubleshooting steps, and optimization practices to ensure seamless performance.
Understanding the Components of H644l2
Before initiating the installation process, it is important to familiarize yourself with the components of H644l2. The system is composed of a main control unit, several connection modules, a power interface, and software configuration tools. Each component serves a specific purpose, and understanding its function will make installation smoother. The main control unit acts as the core processor, managing all operational commands. Connection modules enable integration with other devices, while the power interface ensures stable electricity supply. Software configuration tools allow for proper calibration, updates, and performance optimization. Identifying and verifying each component prior to installation can prevent common errors and delays during setup.
Preparing for H644l2 Installation

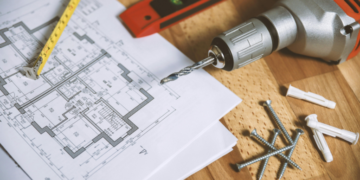
Proper preparation is critical for a successful H644l2 installation. Begin by selecting a suitable location that is free of dust, moisture, and other environmental factors that could interfere with the system’s performance. Ensure that the workspace is spacious enough to accommodate all components and tools. Gather all required installation tools, including screwdrivers, cable organizers, and any safety equipment necessary for handling electronic devices. Additionally, verify that your electrical system meets the specifications required for H644l2. Proper preparation minimizes risks, reduces installation time, and enhances the overall reliability of the system once operational.
Step One: Setting Up the Main Control Unit
The first step in the installation process involves setting up the main control unit of H644l2. Position the unit on a stable surface or mount it according to the manufacturer’s guidelines. Connect the power interface to the unit carefully, ensuring that the polarity is correct to prevent damage. Many users overlook the importance of grounding the unit, which is essential for protecting the system from electrical surges. Once powered, the control unit may require an initial boot sequence, during which it performs self-diagnostics. Observing this process ensures that the unit is functioning correctly before connecting other components.
Step Two: Installing Connection Modules

After the main control unit is ready, the next step is to install the connection modules. These modules allow H644l2 to communicate with external devices, sensors, or networks. Begin by aligning each module with its designated slot, following the manufacturer’s orientation guide. Secure each module firmly to prevent loose connections, which can lead to performance issues. Once physically installed, connect the necessary cables to enable communication between the control unit and the modules. Testing the connections at this stage is recommended to confirm that the system is recognizing all installed modules correctly.
Step Three: Configuring the Software
H644l2 relies heavily on its software interface to manage operations efficiently. Once the hardware components are in place, installing and configuring the software is crucial. Begin by inserting the installation media or downloading the software from the official source. Follow the on-screen instructions carefully, making sure to select the appropriate configuration settings for your environment. The software allows for calibration of the system, assignment of parameters, and optimization of performance. Proper configuration ensures that H644l2 operates smoothly and avoids potential errors during regular use.
Step Four: Connecting to Power and Network

A stable power supply and network connection are vital for the proper functioning of H644l2. Connect the power cables to a regulated source, ensuring that voltage fluctuations are minimized. If the system includes network functionality, connect it to a secure and stable network to enable remote monitoring and control. Many installations fail due to insufficient network setup or unstable power sources, making this step critical. Once connections are secure, perform a preliminary power-on test to verify that all components are receiving electricity and communicating correctly.
Step Five: Performing Initial System Tests
After installation and configuration, initial testing is essential to confirm that H644l2 operates as expected. Begin by running the diagnostic tools available in the software interface. Check for any error messages, connectivity issues, or unusual behavior. Perform functionality tests on each module and component to ensure they respond correctly to commands. Documenting the test results is recommended for future reference, as it provides a baseline for troubleshooting any issues that may arise. This stage ensures that the system is fully functional and ready for operational use.
Common Installation Challenges and Solutions

Even with careful preparation, users may encounter challenges during H644l2 installation. Common issues include incorrect module alignment, software configuration errors, power fluctuations, and network connectivity problems. Addressing these challenges requires attention to detail, proper reference to the installation manual, and occasionally consulting technical support. Ensuring that all components are compatible, correctly installed, and updated with the latest firmware helps prevent most installation issues. A proactive approach to troubleshooting during installation saves time and ensures long-term reliability of H644l2.
Optimizing H644l2 Performance
Once installation is complete, optimizing the performance of H644l2 is the next priority. Regularly update the software to access new features and security improvements. Fine-tune configuration settings to match your operational requirements and ensure efficient use of resources. Monitor system performance through built-in diagnostic tools and adjust settings as necessary to maintain optimal efficiency. Proper maintenance, including cleaning hardware components and checking for loose connections, also contributes to sustained performance over time.
Conclusion
Installing H644l2 may seem complex at first, but following a structured, step-by-step approach ensures a smooth and successful setup. Understanding the components, preparing the workspace, installing hardware, configuring software, and testing the system thoroughly are essential steps in the process. Addressing common challenges proactively and optimizing system performance post-installation will result in a reliable and efficient H644l2 system that meets your needs. Whether for personal or professional use, following these detailed instructions will provide a strong foundation for utilizing H644l2 to its full potential.
Frequently Asked Questions
1. What is H644l2 used for?
- H644l2 is used for a variety of applications, including automation, device integration, and improving operational efficiency in both personal and professional settings. It allows users to connect multiple modules and devices under a centralized control system.
2. Is H644l2 difficult to install for beginners?
- While H644l2 involves multiple components and configuration steps, following a detailed step-by-step guide makes it manageable even for beginners. Proper preparation and careful attention to instructions are key.
3. How do I troubleshoot H644l2 installation issues?
- Common troubleshooting includes checking module connections, verifying software configuration, ensuring stable power supply, and confirming network connectivity. Most issues can be resolved by reviewing installation steps and consulting the user manual.
4. Can H644l2 be updated after installation?
- Yes, the system software can be updated to improve functionality, fix bugs, and enhance security. Regular updates are recommended for optimal performance and to take advantage of new features.
5. What maintenance is required for H644l2?
- Maintenance includes cleaning hardware components, checking for loose connections, monitoring system performance, and updating software. Regular upkeep ensures long-term reliability and efficient operation.


